I have learned that there is no single method to produce great astro-images. With that said you need a basic workflow that works for you. Using your basic workflow you can tweak things for certain image issues.
Broadband objects: Galaxies, Clusters, Dark Nebulaa
Blink
Blink is a very handy tool that offers the ability to review every subframe in a folder. You simply point to the folder and view every raw image. Kick out the bad ones so you can concentrate on the good ones.
Weighted Batch Balance – WBPP
WBPP is the tool that builds you image into a stacked registered state, ready for you to bring out the beauty. Below are the different tab definitions and best settings
Bias Frame Tab
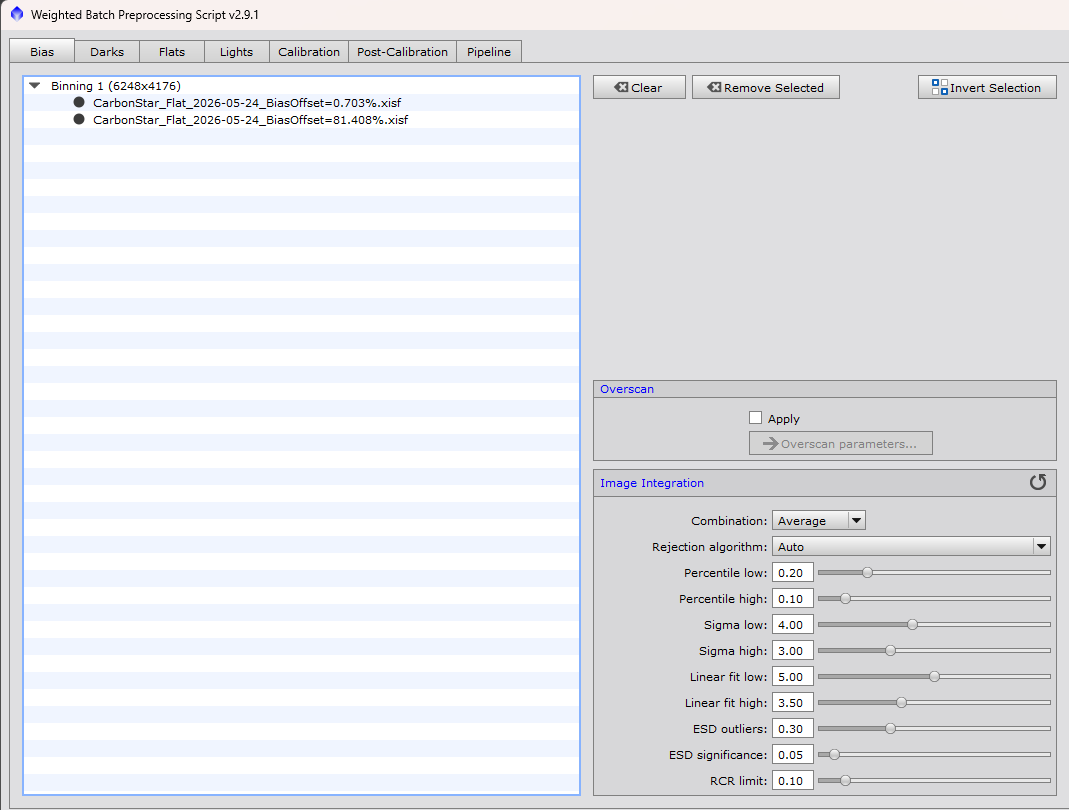
These are recommended but not necessary. Since I use SharpCap to image, I create Flat Frames with Bias. In the center portion of this tab there are some settings, do not touch. These settings allow you to change the way your bias calibration frames register and merge the stacked frames. This is very time consuming. I just leave settings at the defaults.
Dark Frame Tab
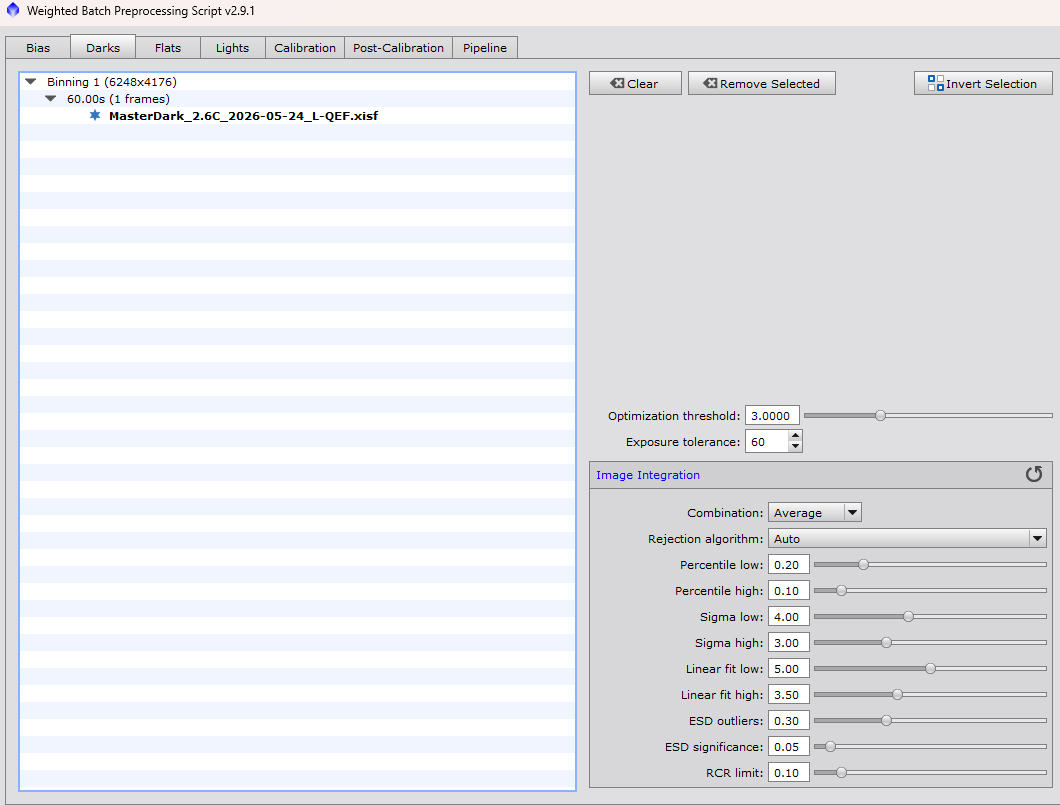
Highly recommended! However, I image with an ASI2600 MC Pro, I do not see differences in my images with or without dark frames. Never the less, I took them and them. I add an entire folder of Dark Frames. I use the same exposure time as my Light Frames, I just add all my darks for that exposure. For example I load every filter combination at 180 seconds. Since I have 6 filters, then I load 7 files. One dark for each filter at that speed and no filter. I let WBPP do the work. In the center portion of this tab there are some settings, do not touch. These settings allow you to change the way your dark calibration frames register and merge the stacked frames. This is very time consuming. I just leave settings at the defaults.
Flat Frame Tab
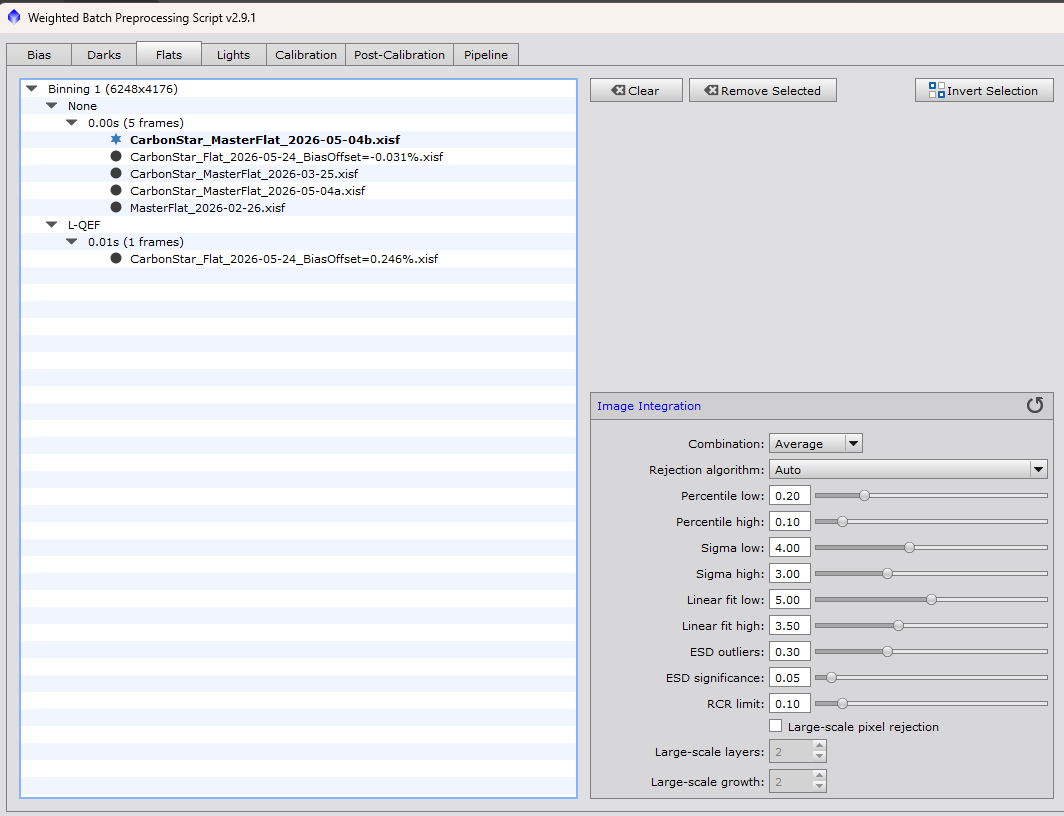
You cannot live without, this is a must have calibration frame. Just like my dark frames, I load a file for every filter as well as no filter. In the center portion of this tab there are some settings, do not touch. These settings allow you to change the way your flat calibration frames register and merge the stacked frames. This is very time consuming. I just leave settings at the defaults.
Light Frame Tab
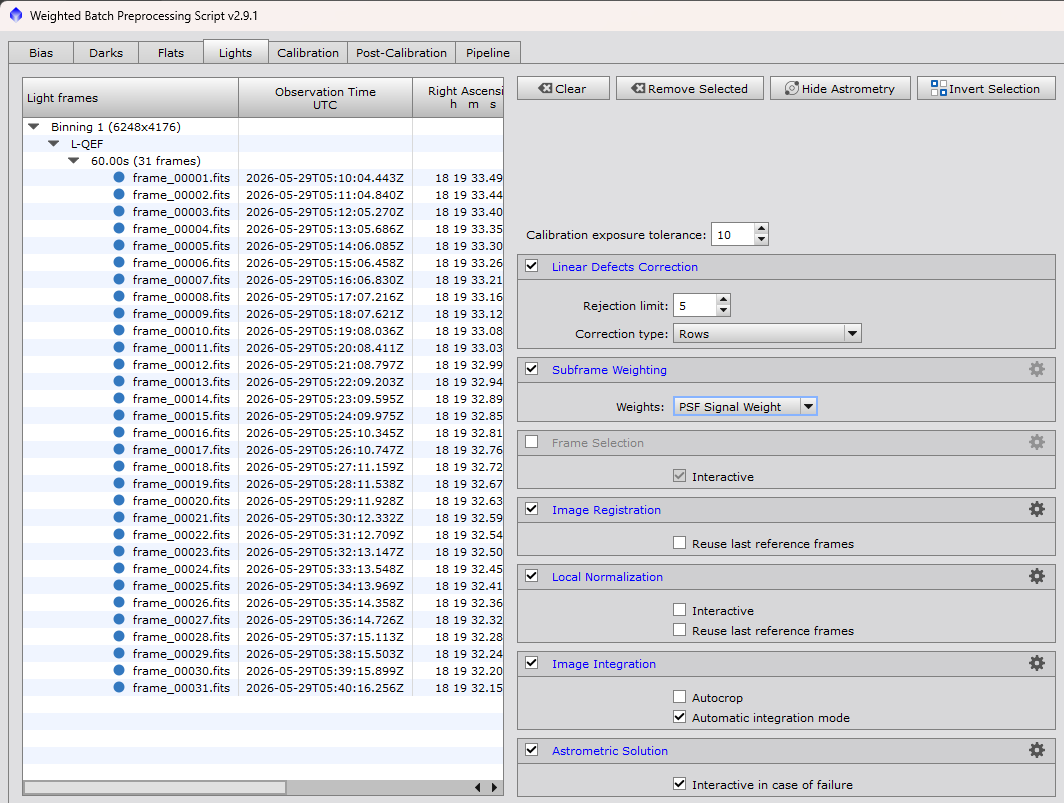
Simply point to the folder where your raw FITS files are and load either all the images or leave out the images you did not want using the Blink tool. In the center part of this tab you have some options and settings.
Calibration exposure tolerance: You can change this number to match Dark Frames to this image when you did not take a Dark for this image. For example, you image is at 300 seconds but the Dark frame you want to us is 240 seconds, you could set this number to 61 seconds to calibrate a 5 minute subframe with the 4 minute calibration frame.
Linear Defects Correction: The normal settings for 5 and rows is all you need.
Subframe Weighting: The normal setting is PSF Signal Weight. I plan on following up on these settings to see how each effects the process.
Frame Section: Should be greyed out with interactive checked
Image Registration: Leave the Reuse last reference frame unchecked or you process will fail.
Local Normalization: Leave both Interactive and Reuse last reference frame unchecked
Image Integration: I turn off Autocrop. By default it is on. I leave Automatic integration mode
Astrometric Solution: Leave this checked. It stores the portion of space the image from in the FITS header
Calibration Tab
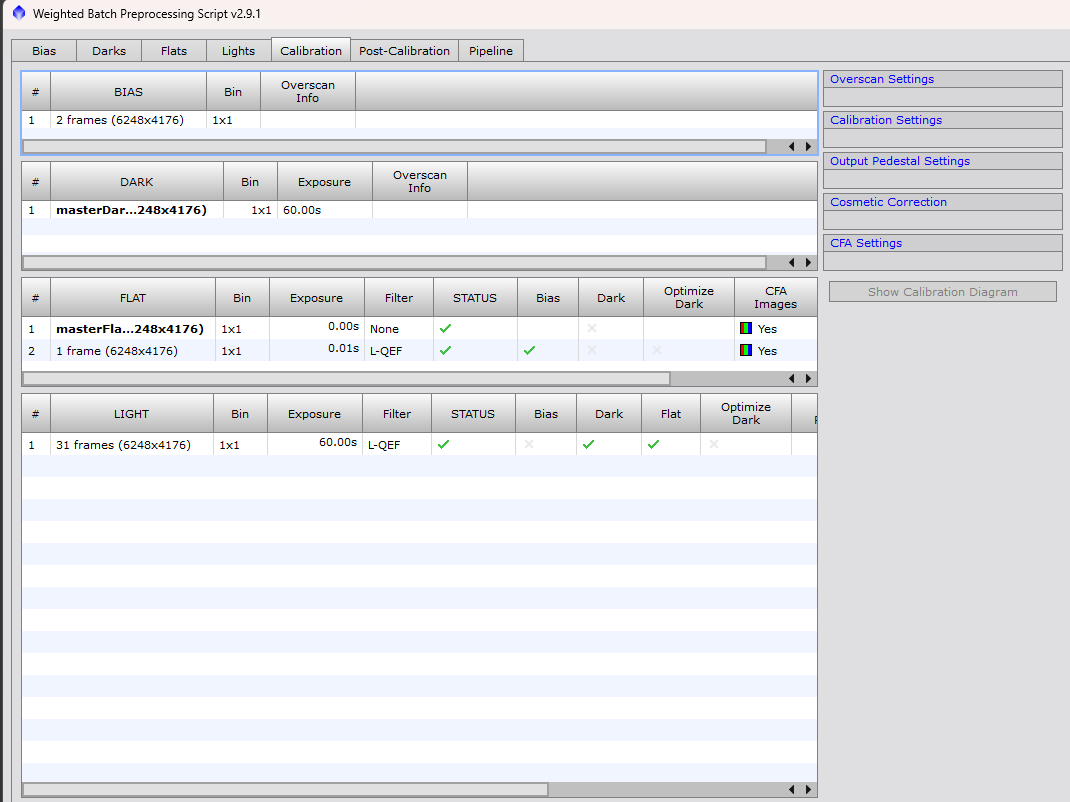
This is just a review page. However you will notice if you add SharpCap’s Bias Flats, they will be listed under bias and still your flat file.
Post-Calibration Tab
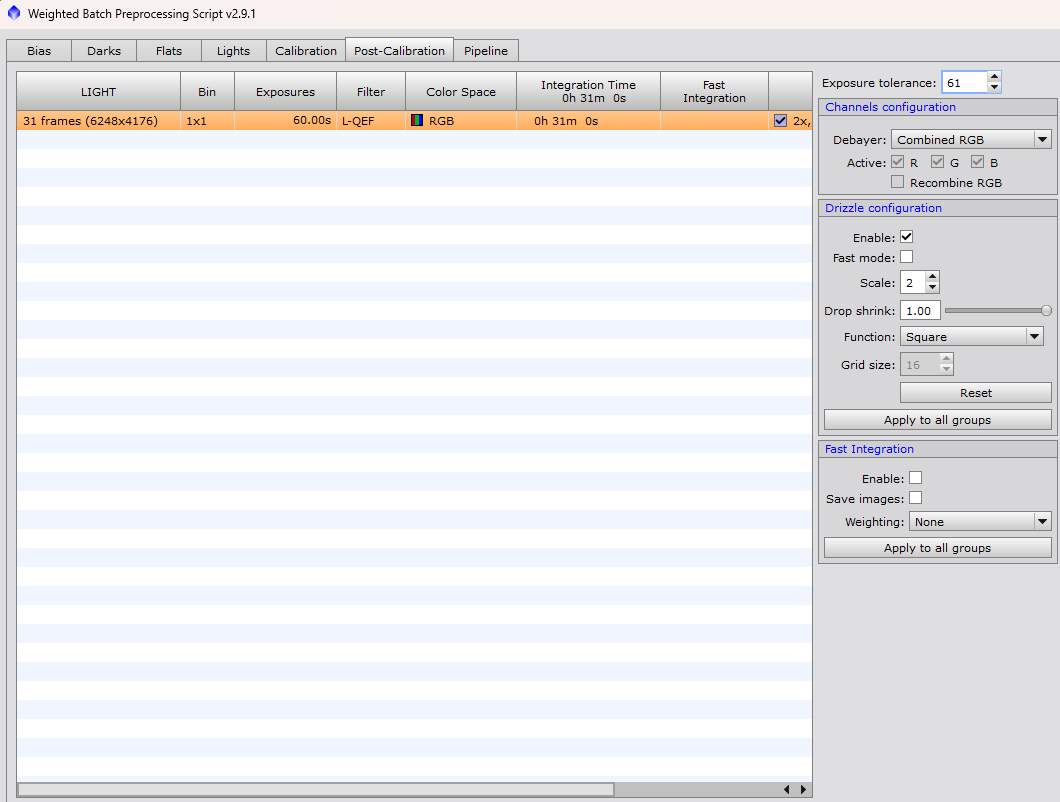
The main part of this tab just displays what is happening. The center portion, needs changes.
Exposure tolerance: If you took sub frames at different exposure times you could use this setting will stack them in the same image. If the image exposure greater than the number here, WBPP makes a separate master image. For example, if you take some frames at 60 seconds and the rest at 120 seconds under normal settings WPBB would stack two master images; one for the 60 second images and one for the 90 second frames. Change this number to 61 and the both images are stacked into the same master file.
Debayer Configuration: The norm with an OSC camera is Combined RGB. You can separate images and work on them individually as if you had a mono camera. One of those tricks that helps under certain conditions.
Drizzle Configuration: My norm is to create a Drizzled image. This feature cleans up noise along with a dithered image. Basically it sharpens and cleans up background noise. I check Enable, leave fast mode unchecked, change scale to 2 and leave the rest of the settings on the defaults.
Fast Integration: I do not enable every, I am not worried about speed. I prefer quality of speed.
Pipeline Tab
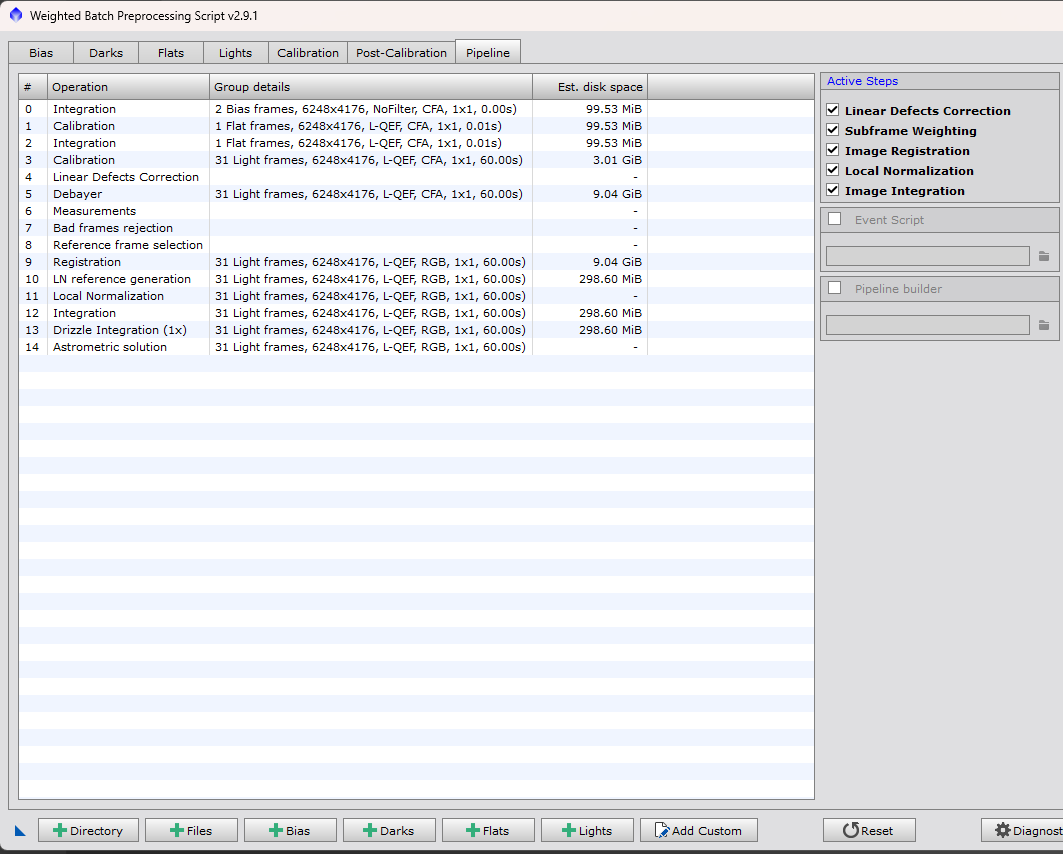
Leave things at defaults. You can uncheck steps you do not want in the process.
The Right Side of the form/screen.
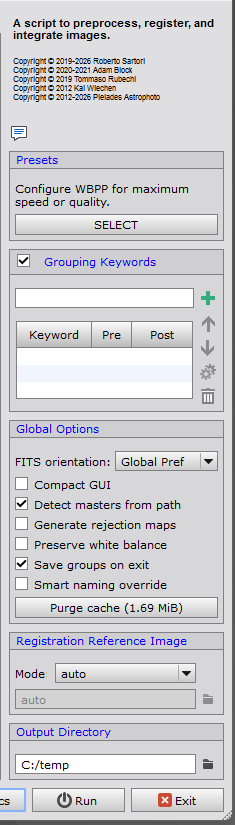
I have a few changes that I like done before pressing the run button.
Presets: Either select Good Quality or Maximum Quality.
Global Options: You do not want the compact GUI. It changes the look of WBPP. Check detect masters from path. I unchecked Generate rejection maps. this are the files that open you just close. I do not check preserve white balance (questioning though). I check Save Groups on exit and uncheck Smart naming override.
Registration Reference Image: Needs to be on auto.
3. Gradient Correction
Run the Gradient Correction tool to remove walking noise from the linar image