🌧️ Weather, Life, and the Path to a Permanent Setup
It was tough finding time to dedicate to this hobby. Between the weather, limited free time, and the usual demands of life, I found myself increasingly frustrated. I wanted to enjoy exploring the night sky with my telescope—but too often, I simply couldn’t.
Just setting up took anywhere from 30 to 45 minutes. That meant leveling the mount, connecting everything, and getting it aligned—only to be clouded out. I wouldn’t even bother bringing the equipment out if the sky looked questionable. And of course, on many of the good or even great nights, I already had other plans. It felt like family, work, and the weather were all pulling me away from something I genuinely loved.
Don’t get me wrong—I love my family deeply. After my wife passed away, I learned a powerful lesson about the importance of time. We’re not guaranteed tomorrow. So I never resented the time spent with them, but I also needed to find a way to keep this hobby alive.
🏗️ Planning the Build: From Cover to Permanent Pier
In the beginning, I tried leaving my equipment outside under a cover when the forecast was merely cloudy. But if there was any chance of rain, everything had to come back inside. Eventually, the hassle led me to start researching observatories. I did what most of us do—I Googled, I asked ChatGPT, I watched videos, and I read reviews. As with any major purchase, cost was a factor, but so were time and convenience.
I was initially leaning toward a roll-off roof design, until I came across a video where someone described issues with wind—problems they didn’t have once they switched to a dome. That stuck with me.
From there, I narrowed it down to two choices: SkyShed and NexDome. I didn’t think I needed automation at first, so I was leaning toward the SkyShed. I even reached out to Wayne via email and chat. Unfortunately, even after two follow-up emails, I never received a shipping quote.
Since SkyShed quit communicating, I emailed the NexDome team with several questions. They responded right away. After a couple of weeks of thinking it over and doing more research, I made my decision. Ordering was surprisingly simple—almost too simple. After placing the order, I received both an email and a phone call confirming payment options: wire transfer or credit card. I chose the credit card. Just be aware—the price is listed in CAD, and my credit card added a foreign transaction fee, so it’s worth factoring that into your budget.
That was early April. As of late August 2025. U2 summed it right when they sang “I still haven’t found what I am looking for”. It is hard to believe that in March 2025, I tried to order 2 different observatories. Oddly enough both from the same country, Canada. I spoke with Wayne of SkyShed. The plan was to get a POD. The price was perfect. I loved that half clam design would block wind while still allowing me to do a StarSense align. Unfortunately, after a month I got tired of waiting for him to get me a shipping price. He was no longer retuning emails. This lead me to NexDome. Babak was great during the informational call, the sale and the shipping information. Unfortunately, he was story telling. He knew what I wanted to hear and gladly took payment. In his documentation and the call he gave me a 12 week shipping time. It was early April when I ordered. I expected delivery of my observatory by the 15 week period; end of June. By the end of July still no word, not a peep. I emailed. After a week without a response. I used the chat on the NexDome website. After 2 days without a response. I called the phone number on the bottom of the invoice. It had been disconnect! I knew he called me to concerning my credit card and the Canadian / US conversion rate and fees. I was excited when I saw it was a different phone number. No answer! I opened dispute with my credit card company. They immediately started an investigation and took it off my balance while they investigated. About 3 weeks later they closed the case in my favor. So my next step is a roll-off. Not what I wanted. Disappointed!
📚 Learning Before the Build
With the observatory ordered (or so I thought), it was time to learn everything I needed to know. I watched more videos, read blogs, and tried to get a solid understanding of the dome assembly, the flooring, the mount setup, and whether I should go with a permanent pier or stick with my mount’s tripod.
One thing became immediately clear: a permanent pier is absolutely the way to go. You install it once, and it stays exactly where you place it. It’s stable, immune to vibration, and always pointed at celestial north. No repeated balancing, no shifting—it’s ready to go whenever you are.
🧱 From Concrete to Custom: Installing the Pier
At first, I planned to pour a full concrete pier—30 inches underground and 3 feet above ground—with my CGEM II mount bolted directly to the top. But then I had a reality check: twenty years from now, I’ll be 85. If I ever need to dismantle it, I probably won’t be in any condition to break down a solid concrete column.
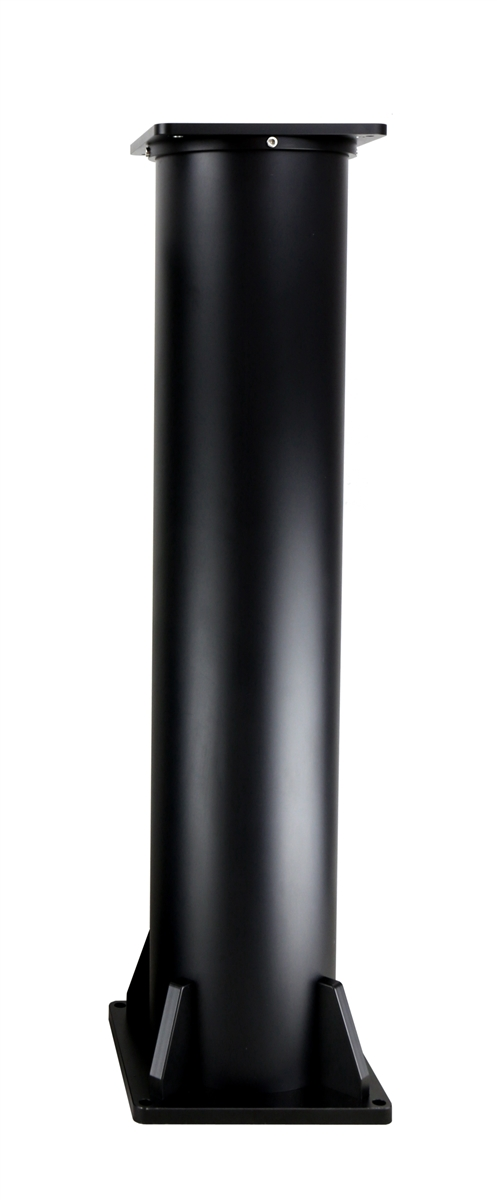
So I revised the plan: concrete below ground with a metal pier above. I chose the iOptron permanent pier, and I’m glad I did. However, because I initially intended to use a concrete pier, I had already purchased the Starizona CGEM II pier adapter kit.
The standard method for mounting the Starizona adapter involves using cemented J-hooks to secure the base. Unfortunately, the bolt pattern on the Starizona adapter didn’t match the one on the iOptron pier. I had two choices:
- Scrap the $250 Starizona adapter and buy the iOptron version instead,
- Or engineer a solution myself.
I went with the second option.
I purchased a ¼-inch thick, 12×12-inch aluminum plate—under $40—and used it to connect the two components. I centered the plate, marked and drilled the necessary bolt holes, and mounted it to the pier.
Next, I aligned the adapter itself. Using the PS Align Pro app on my phone, I located celestial north, marked the final hole positions, drilled them, and attached the adapter.
It wasn’t the path I originally planned, but it worked—and it saved me a decent chunk of money.
Installation of the Mount
Following several days of consistent rainfall, the soil had softened considerably, creating favorable conditions for excavation. I seized the opportunity to dig a hole for the pier mount installation. The excavation measured approximately 30 inches deep and 8 inches in diameter.
To complete the installation, I acquired materials from Lowe’s, including four 3/8-inch threaded rods, nuts and a lock washer compatible with the rod size, eight fender washers, four 2-foot-long rebar rods, four 50-pound bags of cement, a 16-inch concrete form tube, and a 15-inch round wooden stool seat, which fit precisely inside the form tube. I bent the threaded rods to form an L-shape, then wired the rebar rods together and positioned the assembly in the hole.
Next, I placed the wooden seat beneath the mount to serve as a temporary template. I marked the locations for the mounting holes and identified the midpoint of the pier’s top surface to align with celestial north. After drilling the holes in the wood, I bolted each threaded rod into the seat, ensuring that approximately 2.5 inches of thread remained exposed above the surface.
For the concrete, I mixed one-third of each bag using a power drill and a pail. However, I encountered an initial setback: an insufficient quantity of cement. I had underestimated the volume required and discovered that Lowe’s had closed at 6 p.m., preventing me from acquiring an additional bag. Consequently, I was unable to raise the concrete several inches above ground level as planned and had to settle for just slightly above ground level.
Pier Mounting and Alignment
The following morning, I returned to the site and removed the 16-inch cardboard form along with the 15-inch wooden board. I mounted the pier, but noticed that it was not entirely level. To address this, I removed the pier, installed additional nuts below it to serve as height adjusters, and remounted it. This adjustment allowed me to achieve a leveling accuracy within 0.3 degrees.
Regarding alignment, I was off by approximately 0.5 degrees from true celestial north. Upon reflection, I believe a more accurate orientation could have been achieved had I waited to mount the aluminum plate until after securing the pier in place. I may need to purchase a new aluminum plate to re-center the mount; time will determine whether this correction is necessary.
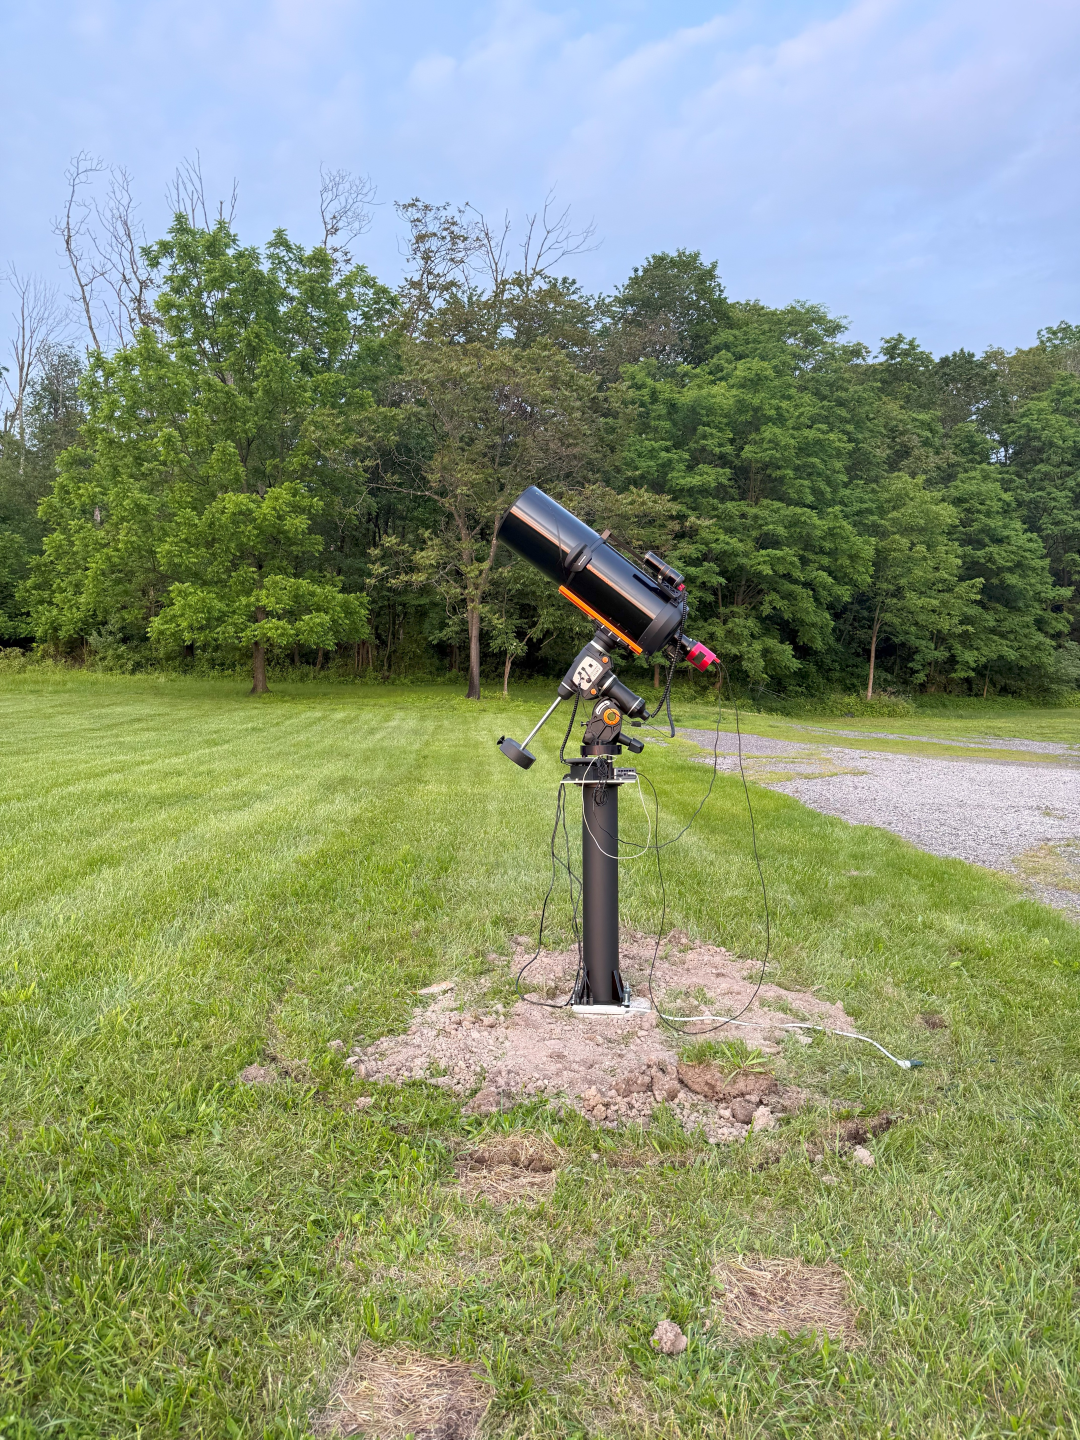
Initial Setup: First Light
At approximately 6 p.m., I began setting up the equipment, including power cords and the CGEM II mount. Although the sky was overcast at the time, the Astropheric app forecasted clearing skies after 9 p.m. Given the increased height of the mount, I prioritized completing the installation during daylight hours to ensure safety and precision during the initial operation.
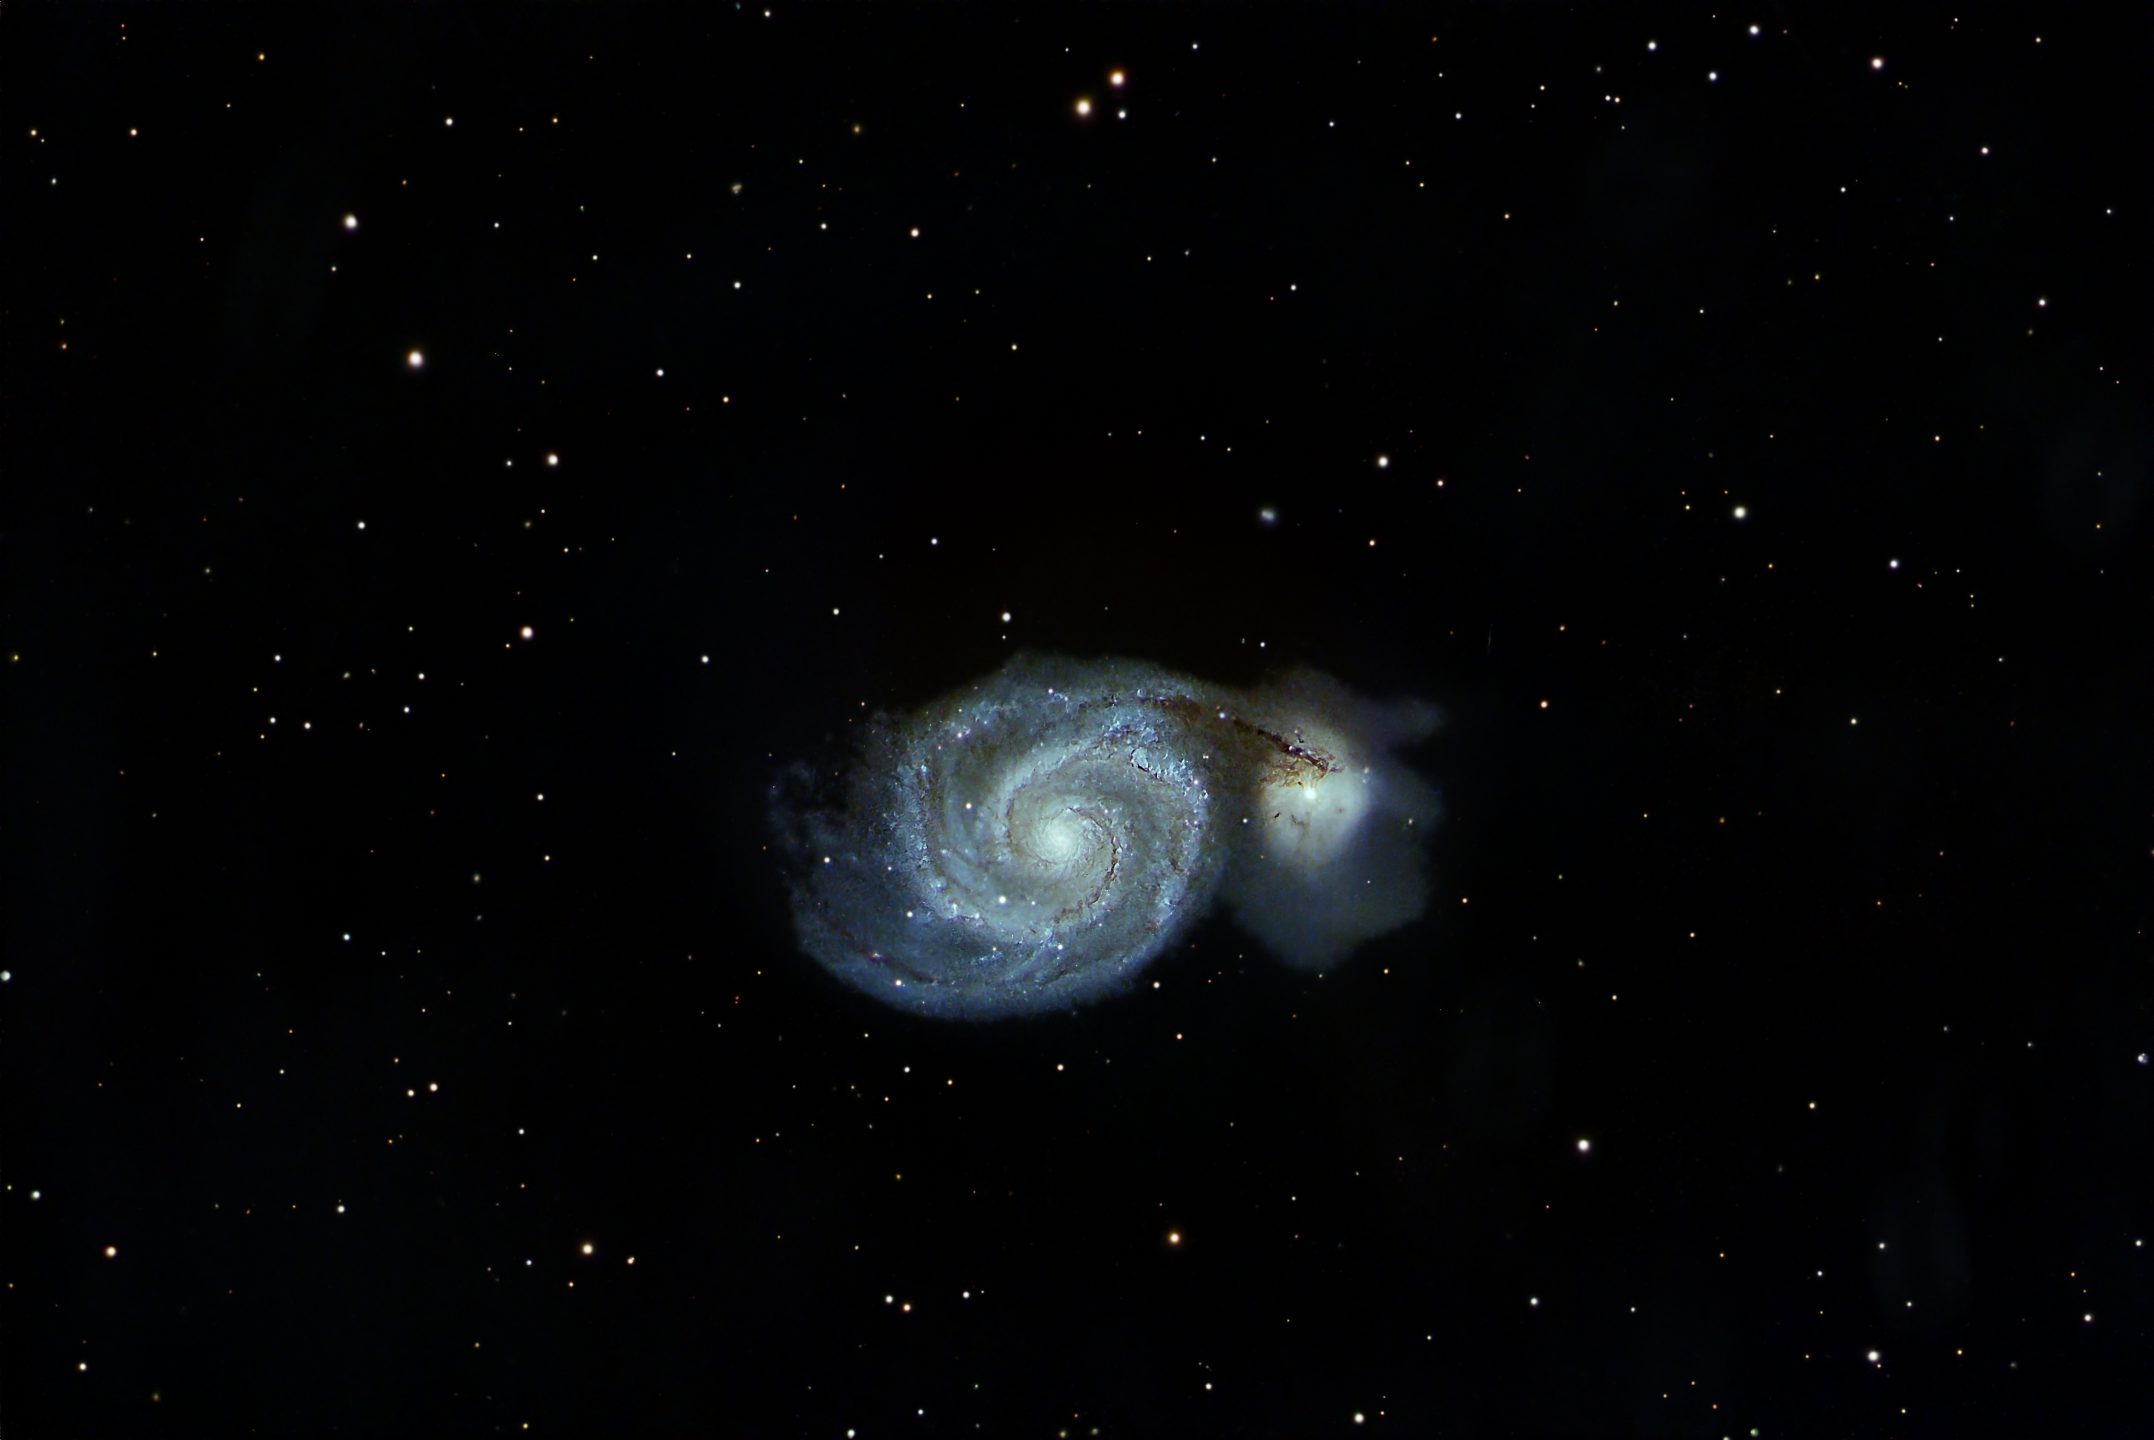
Finally at 10:30 or so, the clouds broke. I was able to see Polaris. But the mount was pointing at Polaris’s location at 6 p.m. I performed a StarSense Auto Align and synced the mount to SharpCap. M51 seemed like a great target for the First Light. I had drifting, But I did not have shaking or focus issue. I took 61 5 minute long exposures. I had drifting because I did not polar align. The mount is SOLID, no other movement, no shaking, and no bumping. First Light Success!
📚 Rethinking
2025 turned out to be a strange year. The observatory never happened. Between the SkyShed and NexDome setbacks, the unusually cold winter, and my final days working before retirement from my career as a Software Architect, Developer, and Engineer, nothing moved forward on this front.
I planned. I designed. I watched videos and read countless blogs about building a roll-off roof observatory. One of the coolest designs I found was the MiniLAIR Observatory from Dark Dragon Astro. I even bought heavy-duty drawer slides capable of holding 500 pounds. I was completely on board with the project when something finally hit me.
The reason it was taking so long wasn’t because I lacked motivation—it was because I was constantly researching. At some point, I realized it was time to buy rather than build. The build was never going to happen, and honestly, I wanted something better.
What I really wanted was a dome.
So, I went back to searching for the right one. Seemingly every option I found—even some of the $40,000 models—had reviews filled with frustrating experiences and quality concerns. However, there is one company only about an hour away that offers an excellent roll-off roof solution: the Stoltzfus Sky Gazer Roll-Off Shed.
🧱 My Stoltzfus Roll-Off Observatory
I have always said I live a blessed life. Thing always seem to work out for the best for me. In this case the company I retired from at the end of 2025 sold themselves right before it was time to turn in my ESOP. I was expecting a nice chunk of change from my ESOP. Since they sold themselves, my stock jumped in price. I had enough to buy an observatory. I no longer needed to build.
Stoltzfus was great to deal with. They gave me a tour of the observatory, told me all the options and about 1/2 hour later I was picking colors and designing my observatory. The next week or so was a couple of emails confirming the design as well as the information on my permit.